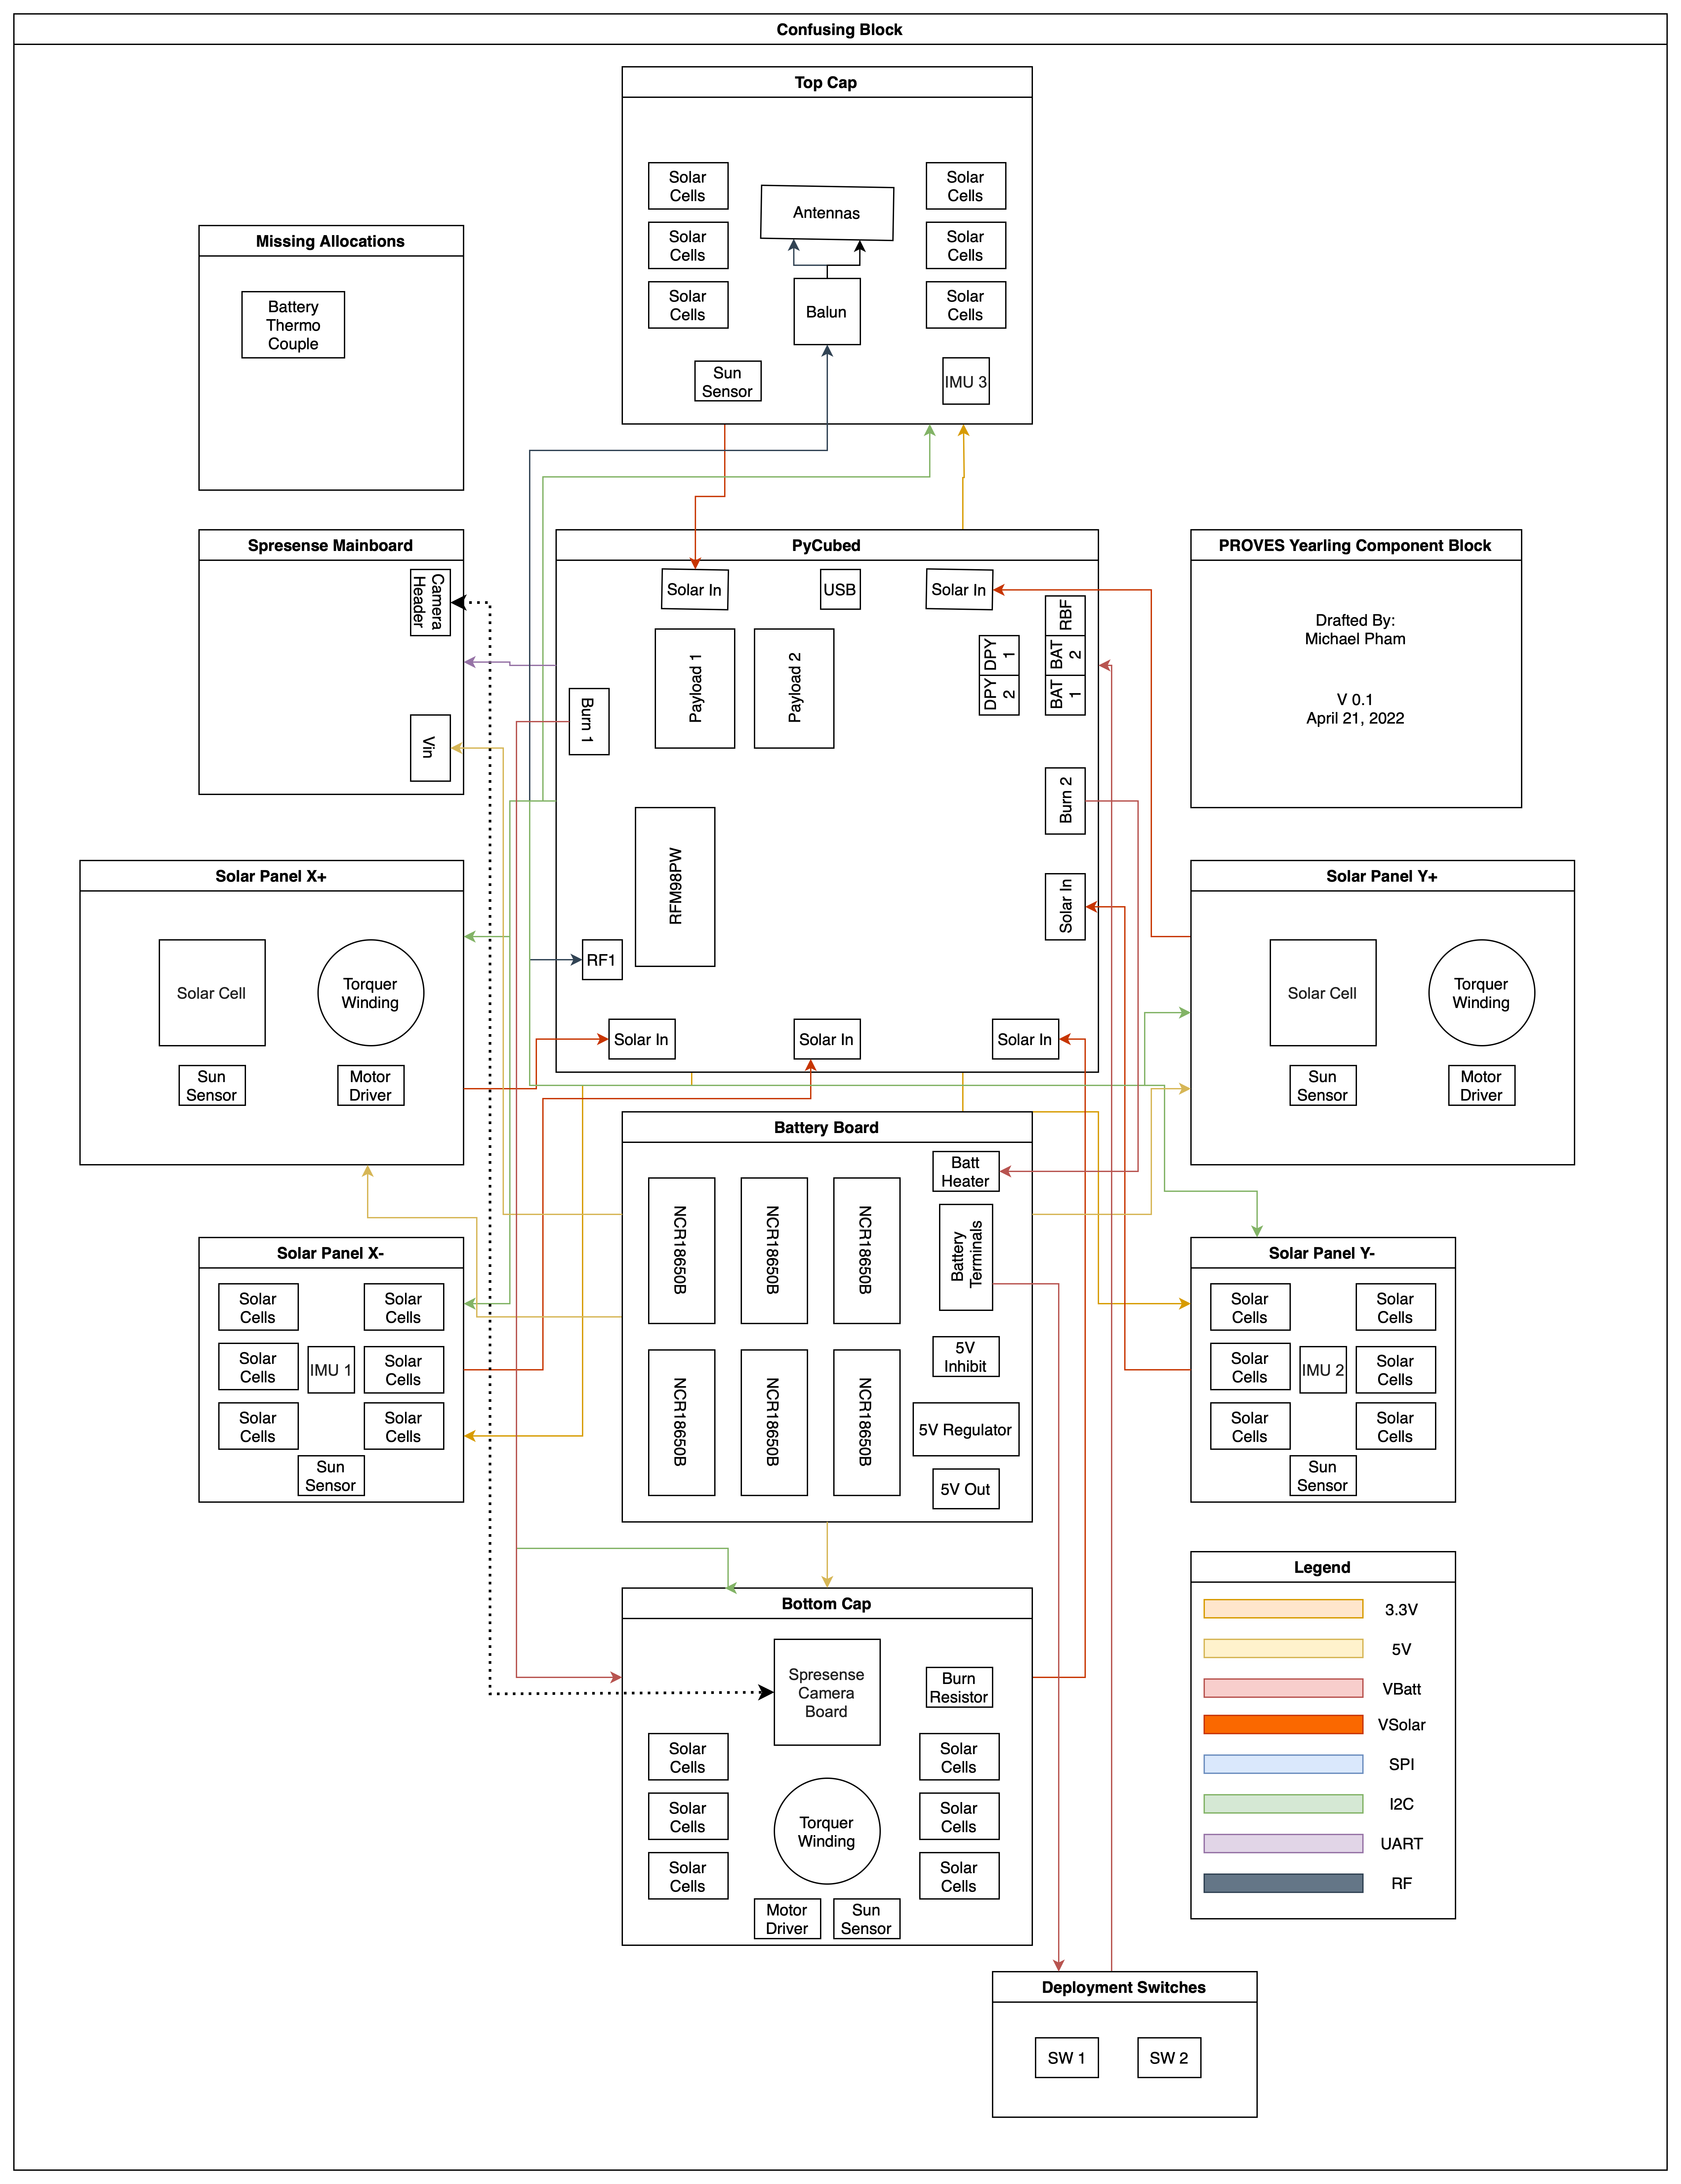
Yearling-1 Block Diagram The Yearling 1 Block Diagrams Figure 1: The Block Diagram for Pleiades - Yearling 1